Cloudflare launched in 2010 offering a variety of features under the free plan. Over the years they continued to innovate and introduced new features. I have been personally using Cloudflare’s free plan for about 3 years and this post is written with the perspective of a free user.
What is Cloudflare?
Cloudflare acts as a middleman between your web application and your visitors. When you turn Cloudflare off, it simply acts as a DNS. In fact, on this year’s april’s fool, they decided to introduce 1.1.1.1 – the fastest public resolver according to dnsperf.com.
Since they are in the middle, they are actually a reverse proxy that acts as an CDN.
Content Delivery Network
A Content Delivery Network (CDN) is a network of caching servers located around the world. We first need to understand why are CDNs needed. A website is made up of many resources such as your texts, images, CSS files and javascript files. When you visit a site, the contents don’t magically appear, instead, your browser has to fetch these content which is located somewhere on the internet.
Here is an example of the resources for the homepage of this blog:
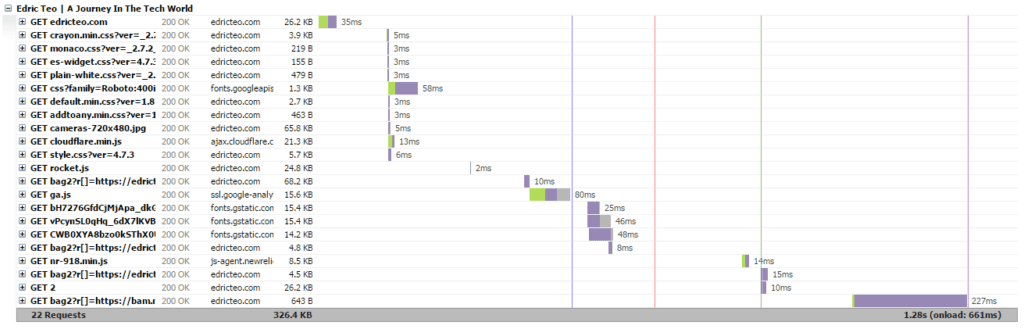
As you can see there are quite a number of resources for your browser to fetch before you could view this site as intended. For this blog, most of the files are located on the web server itself, therefore, every time you reload the site, your browser fetches all these resources from the server itself (assuming you do not have cache version on your browser).
Imagine you are from the United States and everytime you browse this blog, your browser has to go through the effort of getting the resources from the web server which is located in Singapore. The time it takes for the data to transmit from the web server to your browser is known as latency.
The objective of a CDN is to reduce the latency by bringing the resources closer to you.
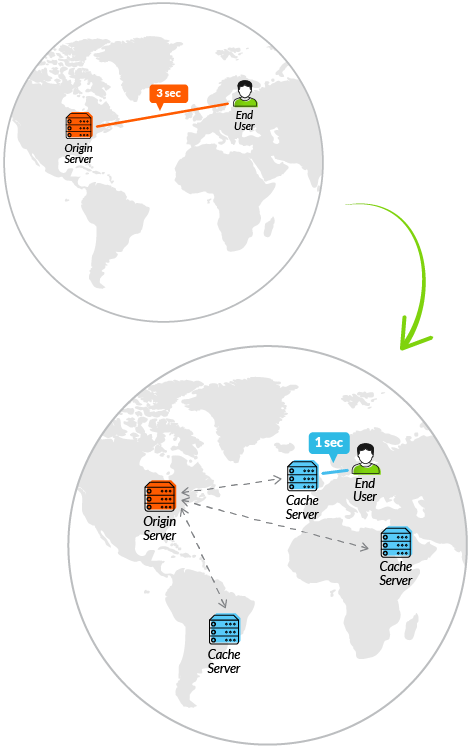
Source: https://www.incapsula.com
In order to achieve that, caching servers are located in different locations around the world also known as points of presence (PoPs).
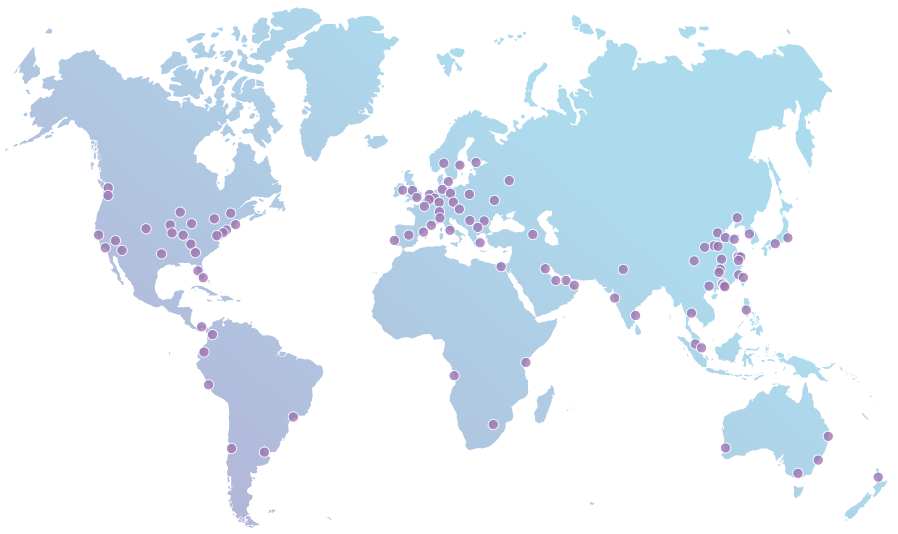
Here is an image of Cloudflare’s PoPs:
A typical CDN requires you to push your resources to these caching servers. However as mentioned earlier, Cloudflare is not a traditional CDN. It acts as a proxy which allows their server to cache your resources.
Domain Name System
Cloudflare must be the one handling your DNS queries. With that said, you should note that since they act as a proxy, they are able to read all your traffic. Even when you have SSL on, Cloudflare will decrypt the traffic on their server and re-encrypt them using the certificates located on their edge servers.
Nevertheless, they provide a beautiful interface which is easy to use and it updates almost instantly.

Security
Secure Sockets Layer(SSL)
Secure Sockets Layer (SSL) is a tunnel which ensures that your traffic is encrypted. In 2014, Cloudflare launched their universal SSL which provides security for their user.
There are 3 types of options:
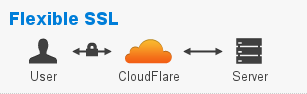
Flexible SSL:
Flexible SSL means that the encryption only occurs between Cloudflare’s edge server and your visitor’s browser. This gives your site the green padlock making your site “look” secure but in fact, the traffic between their server and your web server is fully unencrypted.
Full SSL:
Full SSL means that there is full encryption from your browser to Cloudflare’s edge server to your web server. However, when this option is enabled Cloudflare will not verify the authenticity of your SSL certificate. Hence you could have a self-sign certificate in the web server and no error will be prompted.
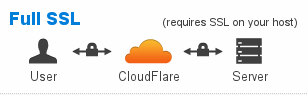
If you were to host your site on a shared web server, then anyone sharing that server with you is able to self-sign a certificate and theoretically decrypt the traffic.
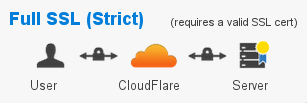
Full SSL(Strict):
This option is the recommended as Cloudflare will validate your certificate. In order to have a valid certificate, you have to get it from a Certificate Authority(CA). Let’s Encrypt is one of the most popular CA which provides free SSL certificates. If you are using shared hosting, most service providers have also integrated Let’s Encrypt into their CPanel and you will be able to get the whole process done in a few clicks.
Why do you need SSL?
In the 2014, Google announced on their webmaster blog that one of the ranking signals would be HTTPS. If you are a business then this should be something to take note of.
Here is the exact quote from Google:
For now it’s only a very lightweight signal — affecting fewer than 1% of global queries, and carrying less weight than other signals such as high-quality content — while we give webmasters time to switch to HTTPS. But over time, we may decide to strengthen it, because we’d like to encourage all website owners to switch from HTTP to HTTPS to keep everyone safe on the web.
-Google, 2014
In September 2016, Brian Dean, an SEO expert conducting an experiment in which they analyzed 1 million google search results and they found out that there is a correlation between high ranking sites and those using HTTPS. Here take a look at this graph from Backlinko:
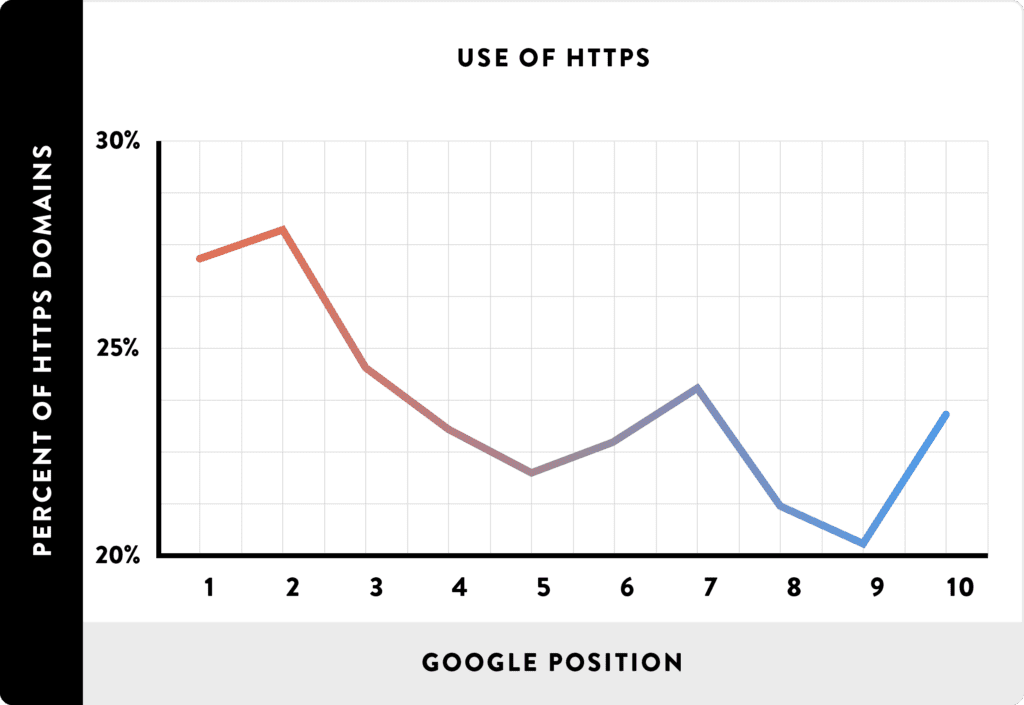
Source: http://backlinko.com/search-engine-ranking
In July 2018, Google Chrome 68 marks all website without SSL as insecure. The trend is clear. Get on the HTTPS trend, or be left out – yes, even for static sites. You can read Troy Hunt’s blog on why even static sites need HTTPS.
I’m Under Attack!
Cloudflare offers DDOS protection for free users with this I’m Under Attack! mode. What it does when this mode is activated, is that it directs the user to an interstitial page for approximately 5 seconds. During the 5 seconds, Cloudflare analyzes the traffic to determine if it is malicious. If determined as the latter, the user will be redirected to a captcha page to solve the challenge. Upon solving the challenge the user is given a cookie so that Cloudflare is able to let the user pass the check in the future.
With that said, it also means that javascript and cookies must be enabled in order or this mode to work.
Recently, one of the websites I managed was a victim of bad bots. They drained huge amount of bandwidth which cost money. I’ve actually mitigated it using this mode.
It is also important to note that there are articles and tools out there which demonstrate the bypassing of this mode.
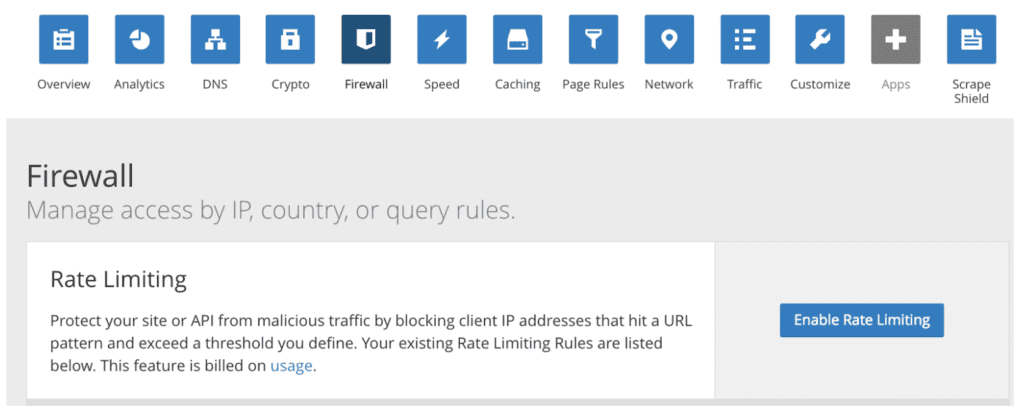
Rate Limiting
Rate limiting was released as a beta before releasing to the public in April 2017. It aims to mitigate Layer 7 DDOS attack which is also known as the application layer. Application layer consists of the web application itself as well as additional services provided such as API endpoints.
You can enable Cloudflare’s rate limit by navigating to the Firewall option in the menu.
Even though this post was for free user, this is a feature I feel that requires attention and could be useful for real world application.
This is an example of the free rate limiting interface:
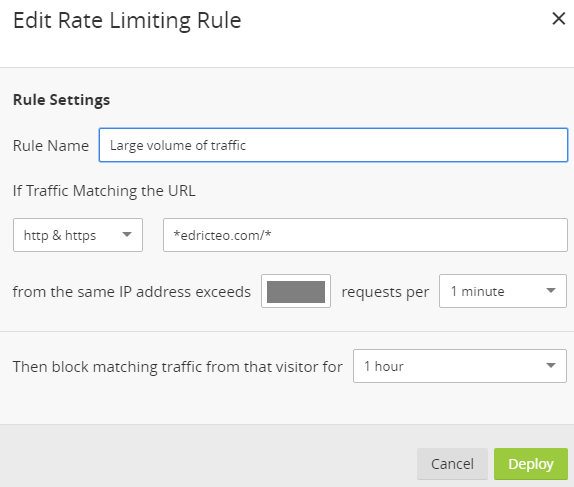
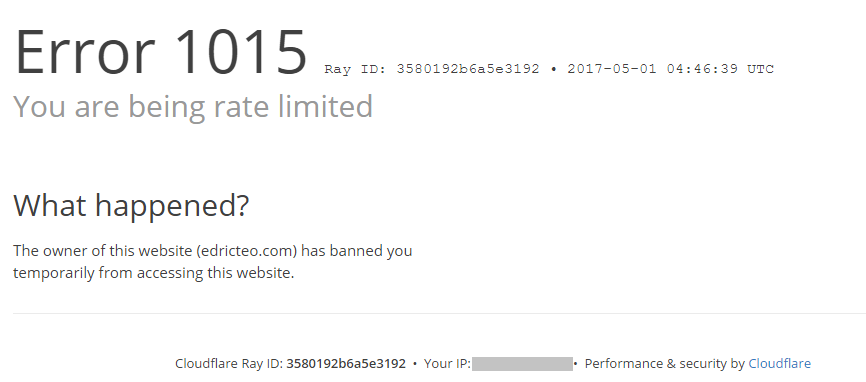
As you can see from the above image, free users can only block traffic. Anyone who exceeds the number of requests you specified will be shown this message:
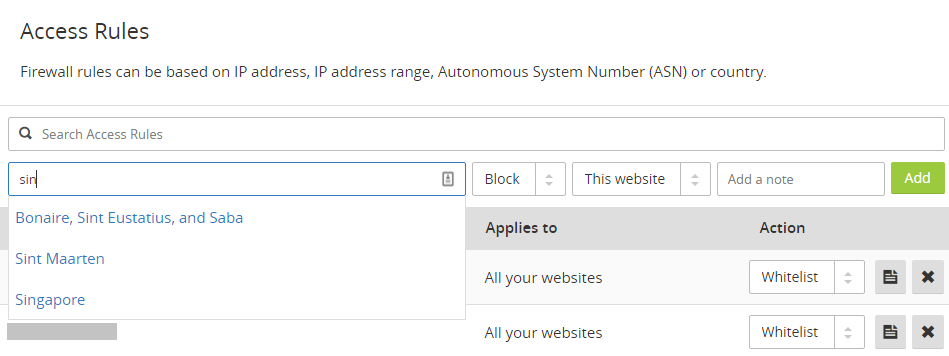
IP Firewall
IP Firewall is a way of controlling access to your website.
You can set the rules based on IPv4 addresses (range), IPv6 addresses (range), Country (either by name or by code) and ASN (autonomous system number**).**
In addition, you also have the ability to control users who are accessing your site using Tor.
Automatic HTTPS Rewrites
Occasionally, you may get Mixed Content errors whereby the browser warns you that you are loading resources insecurely.
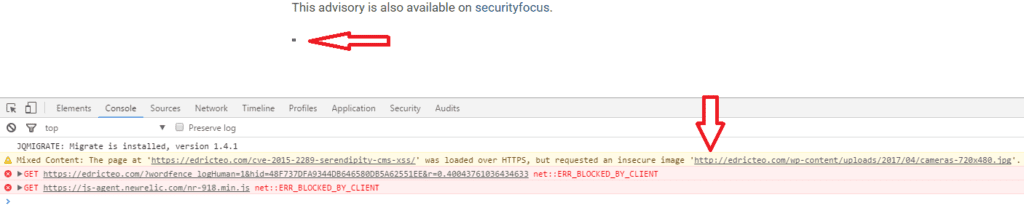
I intentionally force the browser to load an insecure resource by hard coding the URL as seen above (the small dot is an image file of 5×5). However, I wasn’t getting the expected result even after turning on this feature.
I contacted Cloudflare to clarify and it turns out that they rely on HTTPS Everywhere and Google Chrome’s HSTS preload list.
This means that in order for this to work, you will have to send a pull request to HTTPS Everywhere Github’s repository. Note that the above example is an insecure resource from my own domain hence I would be the one submitting the request. Should the insecure resource be from other domain, then the domain owner would be the one submitting the pull request.
Speed
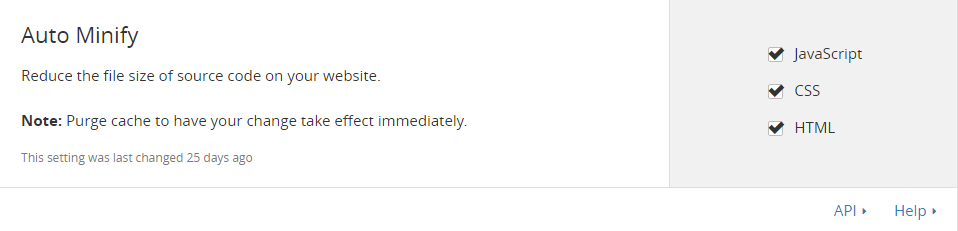
Auto Minify
As mentioned in the CDN section, every resource has to be fetched before presented in your browser. This feature reduces the file size by removing whitespace in your Javascript, CSS and HTML files. It could be activated by clicking on the checkbox:
Rocket Loader™
The purpose of this feature is to bundle upload the javascript after window.onload. This way, your website will render as normal and only load the scripts after the website is rendered.
There are two options to this feature.
Automatic
Automatic allows Cloudflare to handle which scripts to load after window.onload and no configuration is required on the web master’s side. However, by selecting this option some people may encounter issues.
If you are able to single out the cause of the issue, then you could exclude the script from Cloudflare by adding this attribute data-cfasync=”false” to that script.
An example would be something like this:
with the option set to Automatic.
Manual
Manual, on the other hand, requires the webmaster to add this attribute **data-cfasync=”true” **into every script.
An example to include the script would be:
with the option set to Manual.
I used to turn off this feature in the past because it causes error. However in 2018, when I switched it on by accident, it didn’t cause any error like it used to. The flow of resources were loaded in the order they were supposed to.
Mobile Redirect
Cloudflare offers the redirecting of your audience to a mobile friendly site if Cloudflare detects they are using a mobile device. According to Cloudflare, this is done on the edge server to prevent the request from reaching your origin server, and thereby increasing the speed.
This is useful if you have specially created a version for mobile devices.
However, you should note that web application these days should be developed to be mobile friendly and should resize based on device screen size. You can check this on your desktop by entering the developer console and clicking the icon shown in the image below.
You can check this on your desktop by entering the developer console and clicking the icon shown in the image below.
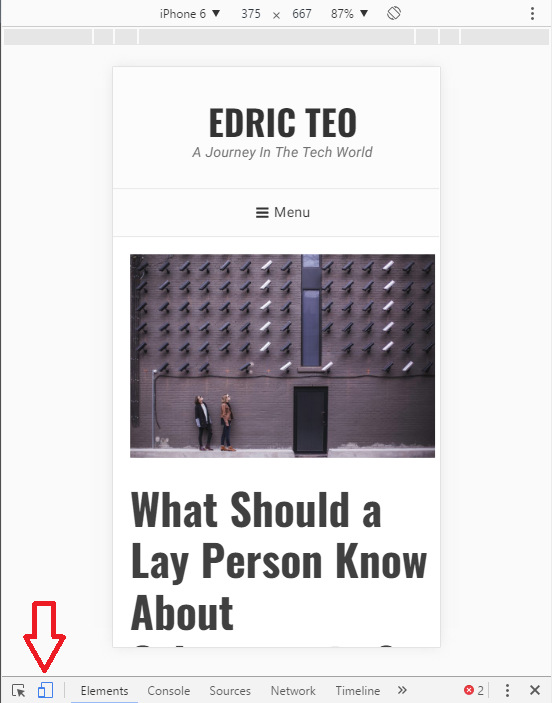
Your responsive website should resize to the phone’s resolution which can be set at the top.
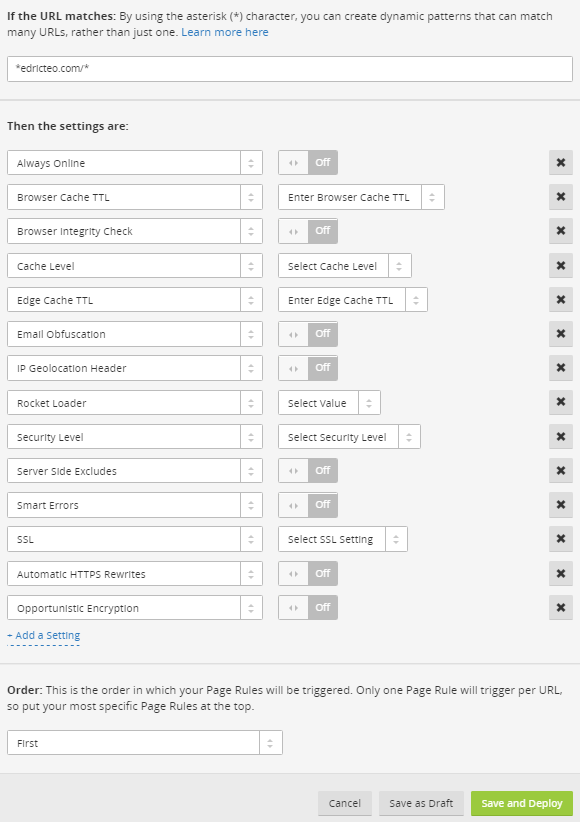
Page Rules
Page rules is probably the best and versatile feature Cloudflare could offer. It includes forcing HTTPS to the different types of caching level.
Here is a list of options page rules offer:
Setting up Cloudflare
Setting up of Cloudflare is pretty straight forward. If you are using hosting sites, there is a chance that Cloudflare is integrated right into your hosting. All you have to do is head over to your Cpanel and look for the Cloudflare logo. If Cloudflare isn’t showing up in your Cpanel, you will have to do this manually.
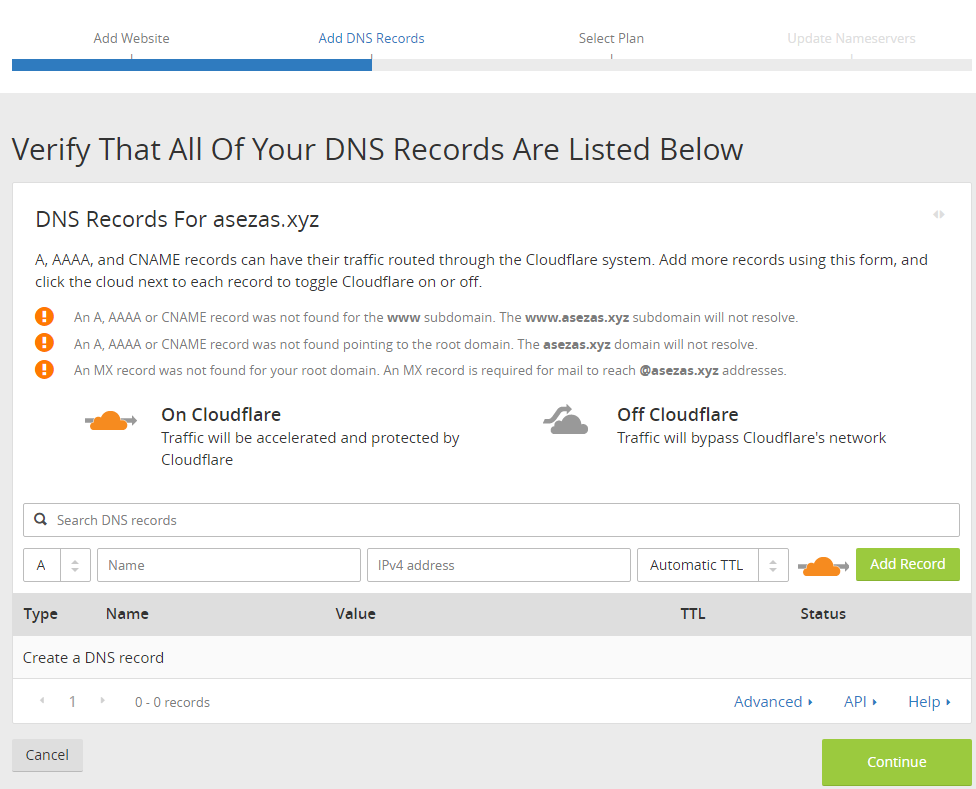
Sign up and head over to https://www.cloudflare.com/a/overview. Click on +Add site located at the top right of the page.
Enter your domain

Add your DNS Records. Don’t worry this can be changed later so you can go ahead and skip it if you want.
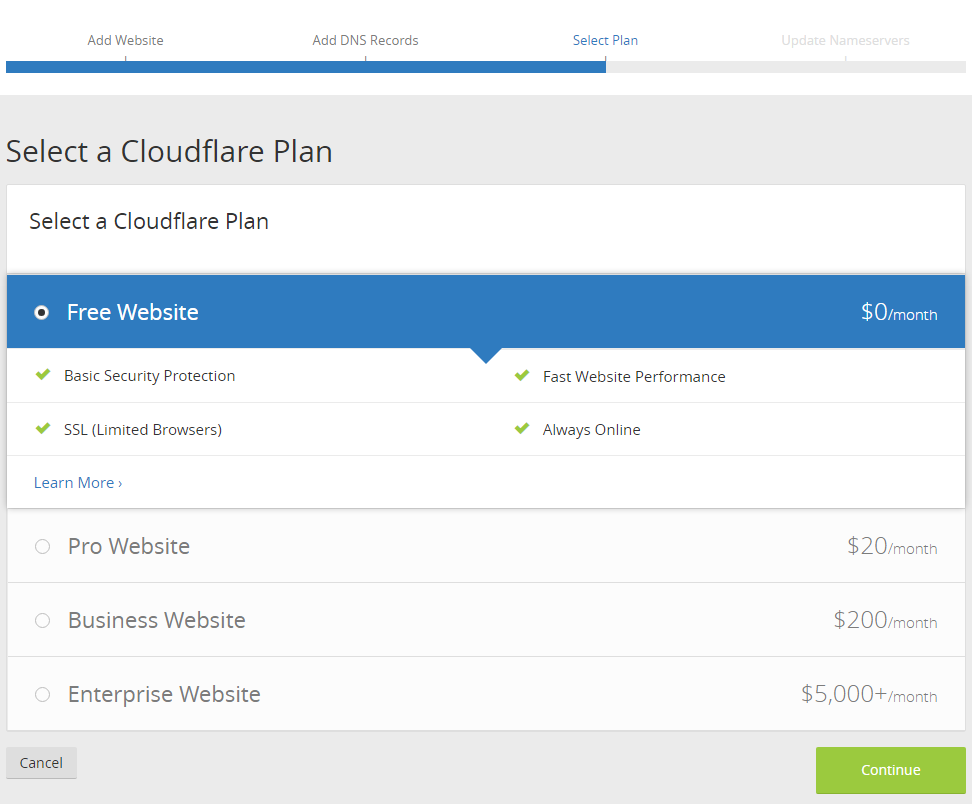
Select your plan. I would say their free plan is sufficient for most people.
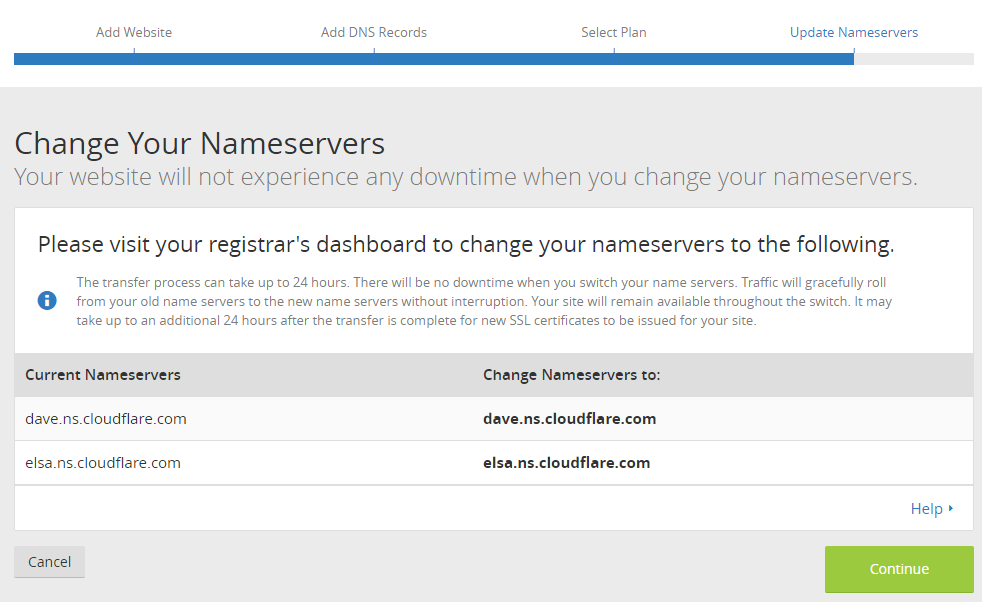
Point your Nameservers to Cloudflare.
For example, if my domain registrar is Namecheap, I would point their Nameserver to the ones given by Cloudflare so they will be able to proxy our requests.
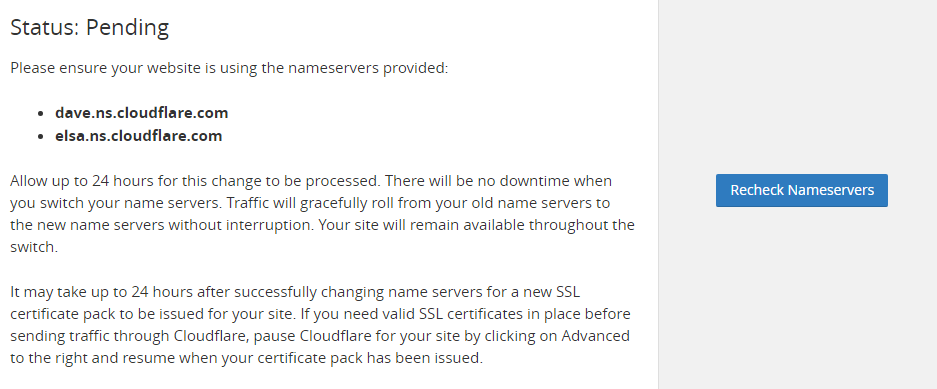
After changing your Nameserver all you have to do is wait for the DNS to propogate.
How do I know if Cloudflare caches my content?
Head over to https://gtmetrix.com and enter your website.
Expand any resources with the extension CloudFlare supports:
| css | bmp | tif | ttf | docx | woff2 |
| js | pict | tiff | eot | xlsx | |
| jpg | csv | eps | woff | xls | |
| jpeg | doc | ejs | otf | pptx | |
| gif | swf | svg | ps | ||
| ico | pls | midi | svgz | class | |
| png | ppt | mid | webp | jar |
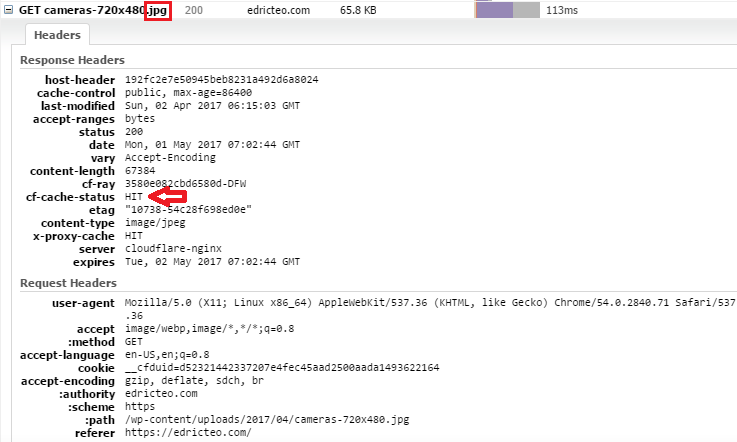
Check for the response header cf-cache-status and if it shows HIT then you’re good to go.
If it shows MISS then Cloudflare is not caching your resources. You can learn more about the other cache status here.
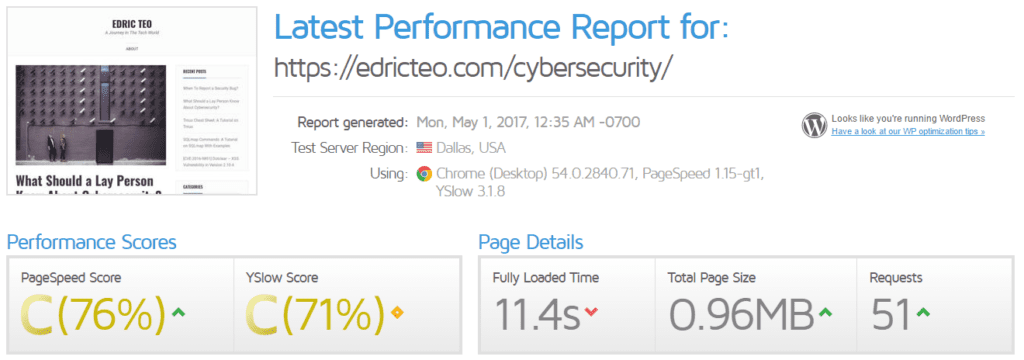
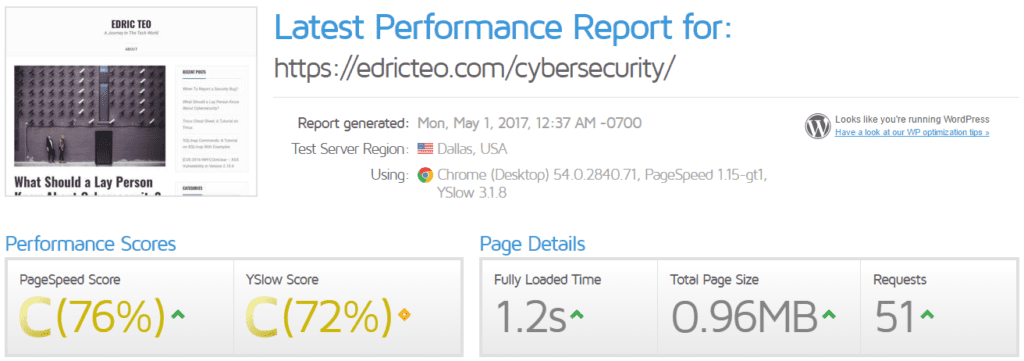
Does Cloudflare really speed up a website and save bandwidth?
Here are screencaps of before and after using Cloudflare. You be the judge.
What about saving bandwidth? Here is a case study.
Troy Hunt, wrote an article on how he handles huge traffic spikes. The background of this article was that HaveIBeenPwned, a service Troy created was featured on a British TV show. Here is the result of what happened:
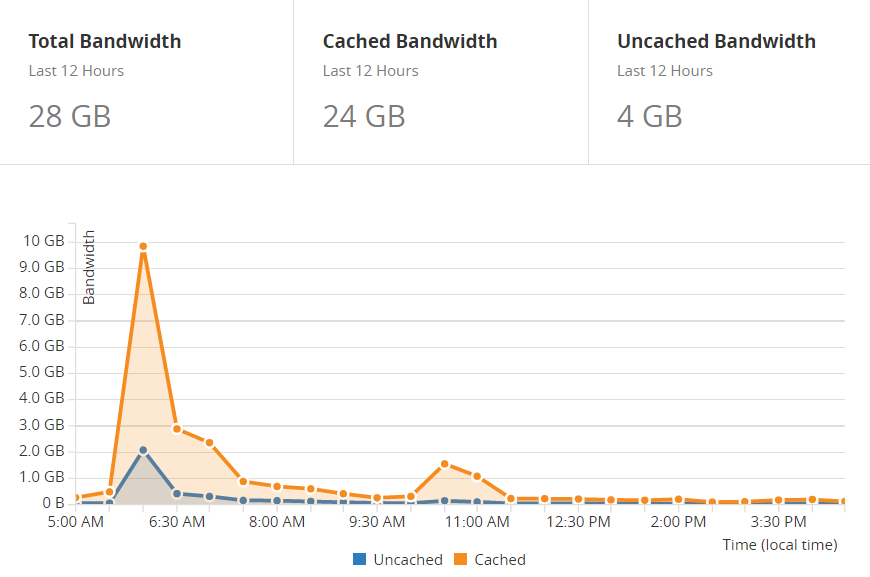
Source: https://www.troyhunt.com/brief-lessons-on-handling-huge-traffic-spikes/
From the graph, you could see that in just 2 hours, Troy peaked at 10GB for cached content. If not for Cloudflare, these requests would be hitting the origin server.
However, you have to realise that since you’re using the free service, expect that you will not be getting the best service.
Cloudflare do not have unlimited storage on their cache server hence even if you have set your expiry to a month, your resource may not be on Cloudflare’s edge server since there are other more active resources being cached.
Conclusion
Cloudflare’s free plan is sufficient for many as it provides excellent features ranging from SSL to improving site speed to reducing bandwidth.
However, all these metrics may vary and differ from others. One of the factors is how optimized your website already is.
An example would be serving unoptimized images, a website that serves images of the highest resolution will result in higher bandwidth savings compared a website serving a scaled down version of the image.
Play around with the settings and find the optimal result for your website.