Tmux Tutorial: An Easy Guide with Screenshots and Examples

If you are a computer science student or someone who enjoys working on a VPS, chances are you are using Terminal 90% of the time.

Unless you are working on UI using a terminal, mastering some terminal commands brings about some benefits.

Maybe it’s just me. But ever since being comfortable with terminal commands, I realized that I had slowly shifted away from UI.

Or maybe I get the feeling of being an l33t hacker getting simple operations done using the terminal.

While working on VPS, there was always a problem of wanting to run a script on it without maintaining an SSH connection.

In addition, terminals that are full screen usually utilize only half the screen and it is a waste of space.

In this tutorial, you will learn how to keep the script running without maintaining a connection as well as maximizing your terminal to its fullest potential.

This tmux tutorial includes

  • Creating a session
  • Detaching a session
  • Creating a new window
  • Switching windows
  • Navigating between windows
  • Splitting panes
  • Navigating between panes

To install tmux type the following:

sudo apt-get install tmux

How Tmux Works

First, let’s first understand how tmux works.

When you execute a tmux command, a tmux server is launched.

Every activity that is launched in the tmux window happens within the server.

Commands or scripts ran within this server continue even after the SSH daemon has closed.

There are three terms while using tmux.

  1. Session
  2. Window
  3. Panes

A session is a single collection of pseudo terminals under the management of tmux.

Each session has one or more windows linked to it.

A window occupies the entire screen and may be split into rectangular panes, in which each pane is a separate pseudo terminal.

Quoted from: http://www.openbsd.org/cgi-bin/man.cgi/OpenBSD-current/man1/tmux.1?query=tmux&sec=1

Tmux Usage

This is optional but you can first ssh into a VPS to experience the full potential of this tool.

I recommend RamNode(aff link) and it is the VPS provider I use when working on small projects.


Session

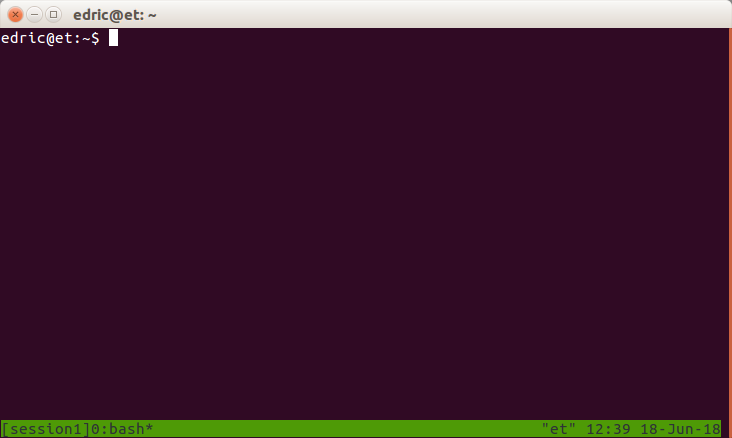
To create a new Session, issue the following command:

tmux new -s session1


To detach a session, type the following:

(Ctrl + b) + d

Note: Type “Ctrl+b” followed by the ”d” key separately

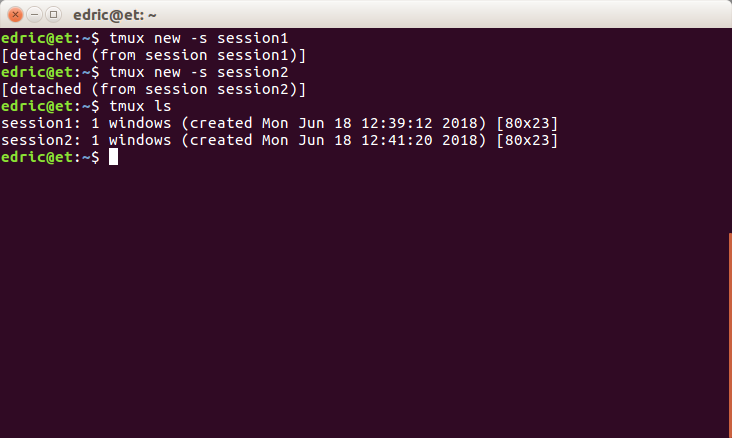
Now I will create another session called session2:

tmux new -s session2

And detach the session (Ctrl + b) + d to return to the main terminal.

You can list all the sessions by issuing the command:

tmux ls

To enter a session that was previously created, type:

tmux attach -t

In this tutorial, we will be attaching to session 1. Therefore, the command will be:

tmux attach -t session1

Window

Now we will move on to the concept of Window.

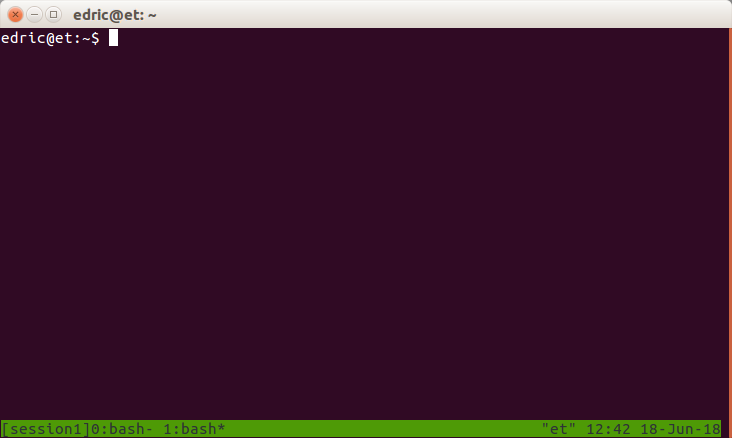
Type (Ctrl + b) + c to create a new window.

To switch between the windows, enter the following:

(Ctrl + b) + n (Next window)

(Ctrl + b) + p (Previous window)

Note: The asterisk* is an indicator of the current window

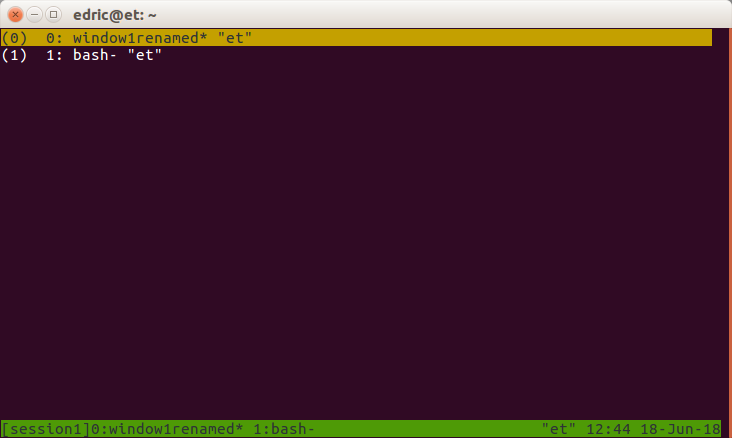
Now I will switch to the first window using (Ctrl + b) + p and rename it using (Ctrl + b) + ,

If you have a lot of windows, you could type (Ctrl + b) + w to list all windows and select using the Enter key.

To delete the current window, type:

(Ctrl + b) + &


Pane

Now let’s move on to the concept of Panes.

Panes are windows that are divided into multiple parts.

In a window, you can split the current in half horizontally or vertically by issuing:

(Ctrl + b) + “ (horizontally)

(Ctrl + b) + % (vertically)

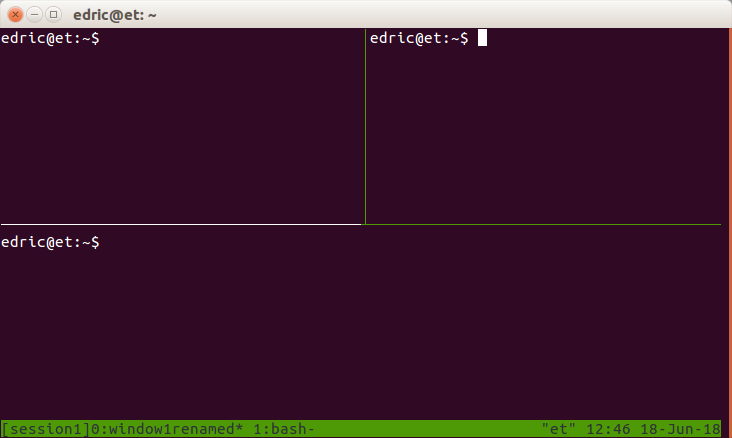
I will now split the window horizontally using (Ctrl + b) + “ (horizontally).

Now I want to split the top half vertically.

However, the focus is on the 2nd pane.

Change the pane by typing (Ctrl + b) + o (Rotate clockwise) to change the selected pane.

Next split the first pane further vertically by issuing (Ctrl + b) + %

Concluding

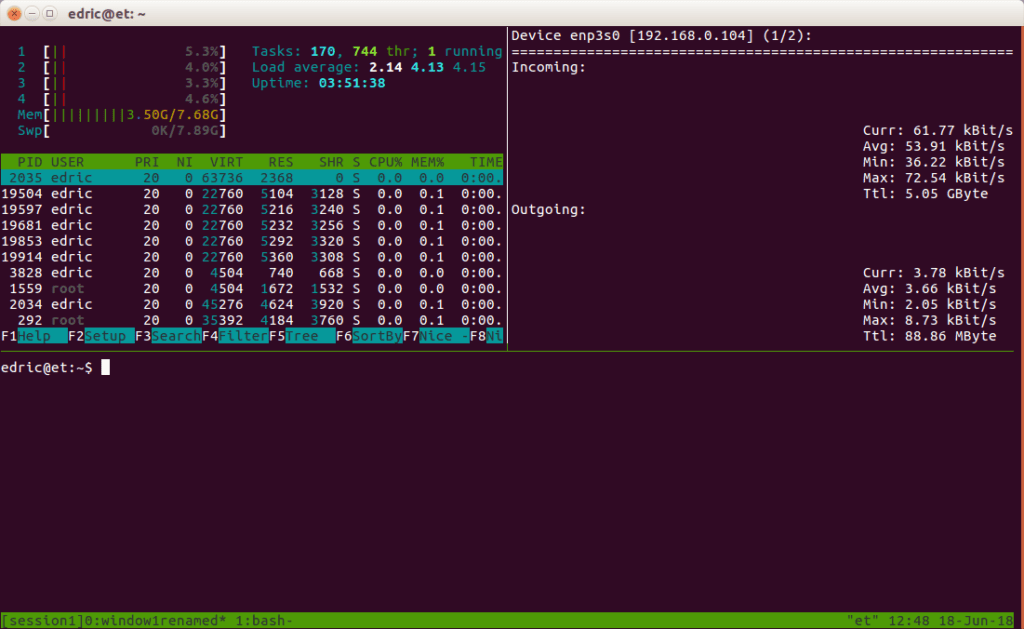
There are plenty of use cases but one of the most important aspects is that this tool gives me the ability to continue running a script after closing my SSH connection.

A sysadmin could monitor different things at the same time without switching terminals all the time.

And since this can be done over ssh, it means the sysadmin could access this live data anytime.

Tmux Cheat Sheet

Category Action Command
Session Rename a session tmux rename-session -t old-name new-name
Session Attach to a specific session tmux attach -t session-name
Session Kill a specific session tmux kill-session -t session-name
Window Rename current window (Ctrl + b) + ,
Pane Move between panes (Ctrl + b) + arrow keys
Pane Resize panes (Ctrl + b) + (Ctrl + arrow keys)
Pane Zoom in/out of a pane (Ctrl + b) + z
Copy Mode Enter copy mode (Ctrl + b) + [
Copy Mode Search in copy mode / (forward search) or ? (backward search)
Misc Display clock (Ctrl + b) + t
Misc List all key bindings (Ctrl + b) + ?

HIBP’s Pwned Passwords API Usage

When Troy Hunt blogged about the adoption of HIBP’s Pwned Password, it got me thinking about an ideal general approach that anyone can take to implement this feature without obstructing the current setup.

Let’s first discuss what this service is about.

Troy has been collecting and verifying data from many headline-worthy breaches. Over the years, he has accumulated a considerable amount of compromised email and password hashes.

Originally, he created an API for developers to query breaches associated with an email address.

In August 2017, Pwned Passwords was implemented. It is an API that allows the querying of a breached password.

With access to such information, developers across the internet are able to warn their users if their current password is found in the database.

Pwned Passwords is not just a database of breached passwords. Its ingenuity comes from how the API was implemented.

k-anonymity model

This means that it is difficult for the API provider to correlate the requested password to an individual.

A typical request looks like this:

https://api.pwnedpasswords.com/range/21BD1

\‘21BD1’ is the first five characters of an SHA-1 hash.

By requesting for a range, it eliminates the uniqueness of an individual’s password since there are at least a dozen of SHA-1 hashes prefixed with ‘21BD1’.

But there is a catch. It is crucial for Troy to find the optimal value. If the number of characters is too small, then the response size would be large which leads to bad performance.

On the other hand, if the number of characters increases, then it reduces the level of anonymity.

Implementation

The implementation is fairly straightforward. There are 2 ways of getting a breached password.

  1. Pwned Passwords API
  2. Downloadable Pwned Passwords

However, I favor using API more than the latter, and here is why.

  1. When using API, the pwned passwords are updated whenever HIBP’s database updates. Therefore you do not have to download the offline version and keep it updated.
  2. In addition, you do not have to store the pwned passwords on the server which translate to more storage space (yay!). However, you are trading off bandwidth which brings me to the next point.
  3. Calling API on the client’s browser instead of the server
    • No interference with the current setup. The check for breached passwords acts as an additional check and validation could still be performed on the server.
    • Currently, there are no rate limits for the API. However, in the future, if the rate limit were to be implemented, we would not have to worry since the request is from the user’s IP address.
    • It could be argued that the check could be bypassed using a browser proxy. This however does not actually compromise any security. Our main purpose is to warn users that the password that they are using is found in other breaches. If they are tech-savvy enough to use a browser proxy, they would have understood the risk.
    • Since the API uses the first characters of an SHA-1 hash, we are required to perform a hashing function on the plaintext password before requesting API. And since the calculation is performed on the client’s browser, we have offloaded this calculation to the user’s device.

Proof of Concept

<!DOCTYPE html>
<html>
<head>
<script type="text/javascript" src="https://cdnjs.cloudflare.com/ajax/libs/jshashes/1.0.7/hashes.min.js"></script>
<script src="https://code.jquery.com/jquery-3.3.1.min.js" integrity="sha256-FgpCb/KJQlLNfOu91ta32o/NMZxltwRo8QtmkMRdAu8=" crossorigin="anonymous"></script>
</head>
<body>

<script>
function checkBreachedPassword() {
  var password = document.getElementById("pass").value;
  var passwordDigest = new Hashes.SHA1().hex(password);
  var digestFive = passwordDigest.substring(0, 5).toUpperCase();
  var queryURL = "https://api.pwnedpasswords.com/range/" + digestFive;
  var checkDigest = passwordDigest.substring(5, 41).toUpperCase();
  var result;

$.ajax({
    url: queryURL,
    type: 'GET',
    async: false,
    success: function(res) {
    	if (res.search(checkDigest) > -1){
        result = false;
        document.getElementById("result").innerHTML = "Result: Breached"
      } else {
        result = true;
        document.getElementById("result").innerHTML = "Result: Not Breached <redirected>"
      }
    }
  });
  return result;
}
</script>

<form action="#" onsubmit="return checkBreachedPassword();" style="margin:auto auto 50px auto;">
  Enter password: 
  <input id="pass" type="password" name="password">
  <input type="submit" value="Submit">
</form>

<p id="result">Result: </p>

</body>
</html>

Above is an example of such implementation. The form uses the onsubmit event handler. If a breached password was entered, the form would not be submitted.

You can try this by clicking the result tab and enter a simple password like ‘123’.

Now try to fat-finger the password field and the form should be submitted to # which leads to the refreshing of the frame.

NUS Orbital Journey

NUS’s Orbital is one of the highlights of a SOC student where we are given 4 module credit to do anything we want. Like literally. Anything.

It lasts an entire summer break with 3 milestones. We were assigned an advisor to guide us throughout the entire project.

This post will be a documentation of the entire process with my personal thoughts.

Lift Off 1, 14 May:

It’s really painful to wake up in the morning since my body is still recovering from the post-trauma after finals. On the morning itself, we were giving a short briefing on what we should expect from orbital followed by two talks, the ideation process as well as software engineering principles.

Honestly speaking, I don’t find that it will value-add to my orbital experience. No doubt it’s good to know that such things exist, but I feel that they are pushing too much of entrepreneurial elements onto us.

entrepreneur

ˌɒntrəprəˈnəː/

noun

  1. a person who sets up a business or businesses, taking on financial risks in the hope of profit.

Coming into orbital my objective is to solve a problem. Not hoping to make a profit.

We were then dismissed for a lunch break.

The first program after lunch was a NOC talk. I couldn’t remember the speaker’s name but I do remember that he gave an excellent talk and he is in charge of the Toronto program. After lunch, audiences usually get either rowdy or drowsy. There is no in-between. But he managed to keep my attention throughout his talk.

Next was Robin giving his presentation on past projects which I find entertaining. Remember my introduction? “to do anything we want. Like literally. Anything.”. Yep, he proved that point. He was also the best person to be doing this talk since he was once a participant and a year later, an advisor.

For the rest of the day, I went into a coma and really couldn’t remember what happened.

Reuben (my partner) and I have no idea what we will be working on over the next 3 months and we have a 1-minute presentation to do tomorrow.

Lift Off 2, 15 May:

We decided to skip the morning workshop and we voice called on telegram to finalize our idea and worked on the presentation slide. I didn’t rehearse for the presentation and hence the quality :/ (yep, for those who were in the hanger, there is one guy who said there are three ways to buy and sell content online, but said “never mind take it as two” because he forgot the 3rd point. That’s me). So I shall take this chance to describe the problem we are trying to solve.

There are indeed 3 ways of buying and selling content online.

  1. Publisher hiring a writer
  2. Publishers to publish an article brief on platforms such as iwriter.com and freelance writers would read the brief and decide if they should proceed with writing
  3. Freelance writer submitting an article to a publisher and hoping that it gets accepted

The problem with the first point is that it isn’t scalable. Hiring is always one of the major problems for growing companies. There is always the formality of interviewing and probation before they are official employees. Such formality is a waste of time. Of course, you could look at the resume and portfolios. But those don’t help you see if an individual fits a company. Imagine hiring a writer that doesn’t suit the company. Now what?

The problem with the second point is that while content is being pumped out, publishers are not getting quality work. Writers using such platforms are often looking for quick bucks. Find a similar article. Re-spin the article. Perform some grammatical touch-ups. And off they go submitting their work to the publisher. While such a platform allows for revision, it is the unnecessary time taken away from a business. How much patience do you have to ask for a billion revisions and still not get the quality you want?

The last point is that this method benefits the publisher a lot. But not so much for content writers. Usually at this stage content writers don’t mind getting fewer bucks in exchange for exposure. Why not have the best of both worlds?

So what do we intend to do?

To create a platform where

  1. Publishers are able to search and purchase articles for topics that they are interested in (solves scalability)
  2. Content writers are able to upload articles/content that they are passionate about (solves the quality issue)
  3. Content writers are given exposure without compromising the value of their work
Advisor, 18 May:

Today we had a voice chat together with our advisor over Skype. It was supposed to be on Lift Off 2 but our advisor started his internship hence the delay. It didn’t really affect us in any way since we were not working on anything for the past few days.

We went briefly went through the objective of the project. The problem we are trying to solve. The stack we will be using (not decided yet). Version control which is Github. The distribution of workload. And the possibility of upgrading to Apollo 11.

The session lasted for about 25 minutes which I find to be pretty productive. It could actually be much longer but since we had not started working on anything there really isn’t any questions to ask.